Correct a misplaced boundary corner
Two practice lots should meet at a corner. One boundary stops short. As Editor, you will move that vertex onto the neighbouring lot’s corner, check the rest of the boundary and submit the correction for review.
Access for this tutorial
Sign in to LandWeave with Editor access to a practice dataset. You can also use an existing Editor tab. See Tutorial access.
Prepare the two starting lots
If your practice dataset already contains the two official lots shown below, start at step 1. You can also use your own pair of practice lots if you know which existing vertex should meet which neighbouring corner.
To reproduce the screenshots from an empty dataset:
- Download the two starting lots (.gpkg). In this file the upper-right vertex of
LOT-Afalls 3 m west and 3 m south of the lower-left vertex ofLOT-B. - Follow Import a GeoPackage and check the result using this two-lot file. Check for 2 new in the preview and 2 drafts after creation.
- Open each draft, select Submit Draft and confirm. Have a Reviewer complete Review Signoff and an Approver complete Final Approve for both. In a multi-role demo, use the corresponding role tabs. See Review and approve a draft.
- Return to the Editor account and find both IDs in Parcels List/Search. Once both are official, the editing exercise needs only the Editor role.
1. Record the starting boundary
Open the official record for LOT-A in Parcels List/Search. Select Show surrounding parcels. Zoom in until you can distinguish the misplaced vertex from the intended corner on the neighbouring lot. In the example, the upper-right corner of LOT-A should meet the lower-left corner of LOT-B.
Turn on XY and zoom to level 19 or closer to read vertex coordinates in metres. Record the target Easting and Northing. Take a screenshot of the official lot with its vertex coordinates, or write down the coordinates in order around the ring. You will use this record to check the saved proposal.
2. Move one vertex
On Parcel Map, open Map Settings and enable Point snapping. Switch off Edge snapping and Follow edge for this exercise. Return to the official record for LOT-A and select the edit button. In Edit Draft, show the surrounding parcels and zoom close enough for snapping to be active.
Select the map toolbar’s edit tool (the pencil). Handles appear along the boundary. Drag the existing corner handle onto the neighbouring vertex. A handle halfway along a side inserts an extra vertex if you drag it.
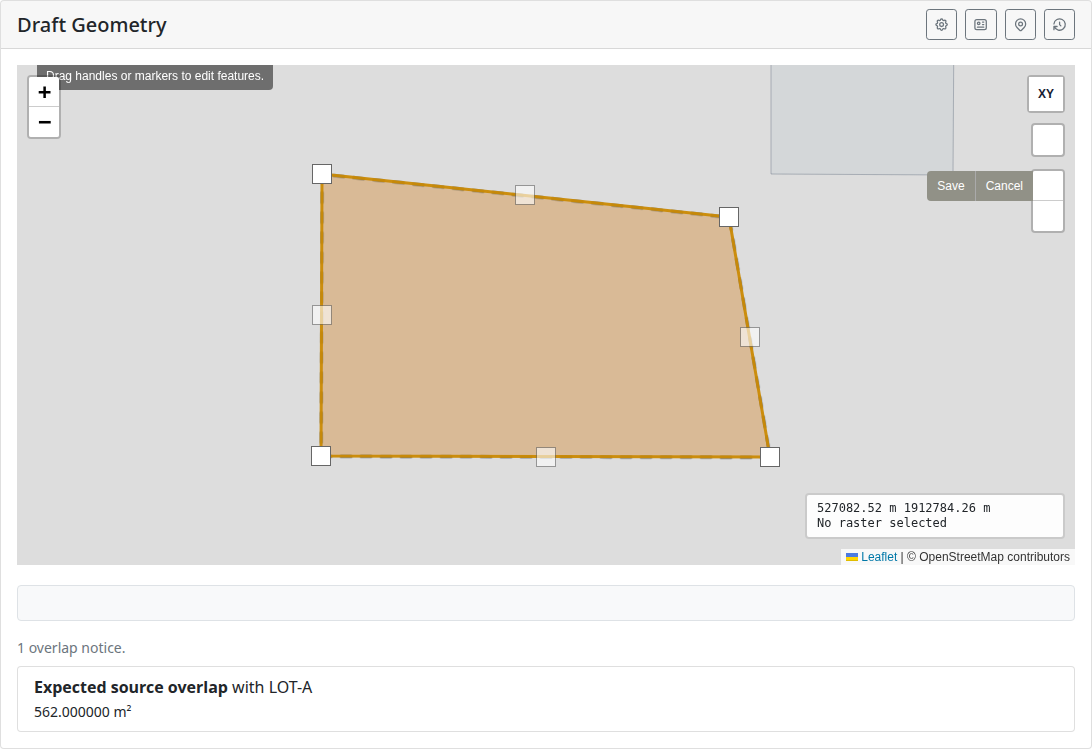
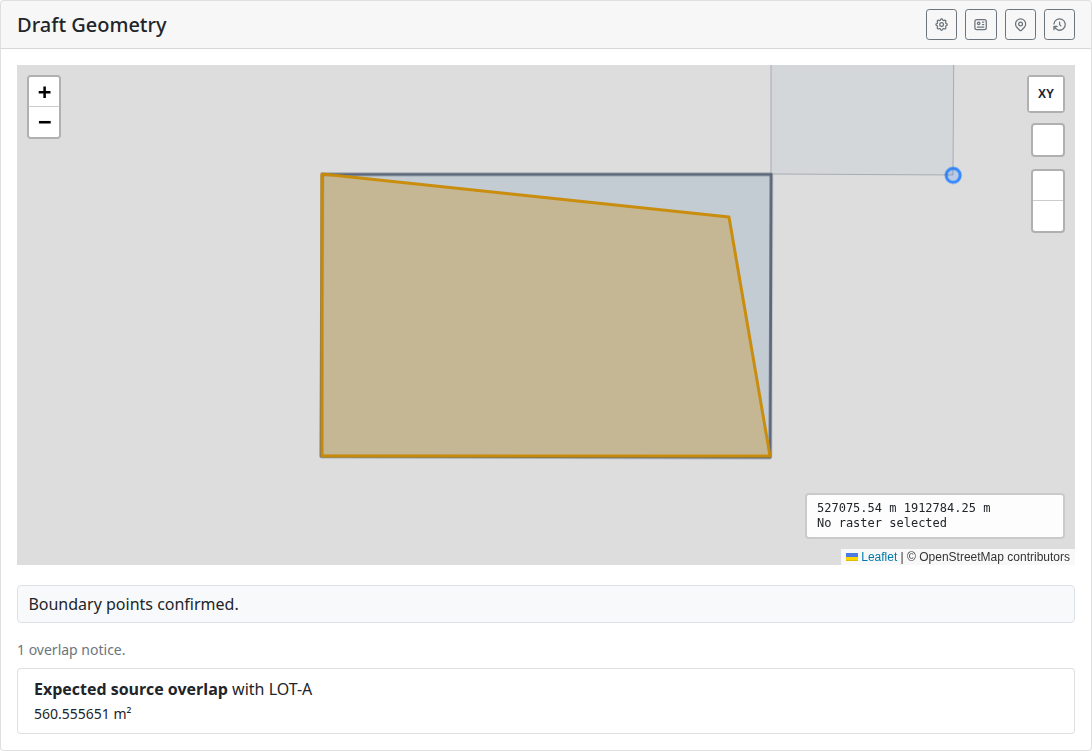
Select Save on the map toolbar to finish the geometry edit. Allow LandWeave to confirm the snap. If it cannot confirm the target, check the zoom, surrounding parcels and point tolerance, then place the corner again. Select Save Draft below the map. Leave the parcel ID and other fields as they were.
3. Compare the proposal and submit it
Open Current Draft from the parcel page. Compare its map with your starting record at the same zoom. With XY on, work around the ring from an unchanged corner. The vertex count should be the same, the moved vertex should have the target coordinates, and each remaining coordinate pair should match the official boundary. At the corrected corner, the two lots should now meet.
If another vertex moved or a new overlap appears against a neighbouring parcel, use Update Draft and correct the proposal before submitting it. Expected source overlap refers to the official lot you are editing.
Record the coordinates of the matching corner and check one unchanged side against your starting record. Select Submit Draft, confirm and check that the state reads Submitted. The official boundary stays in place pending review and approval.
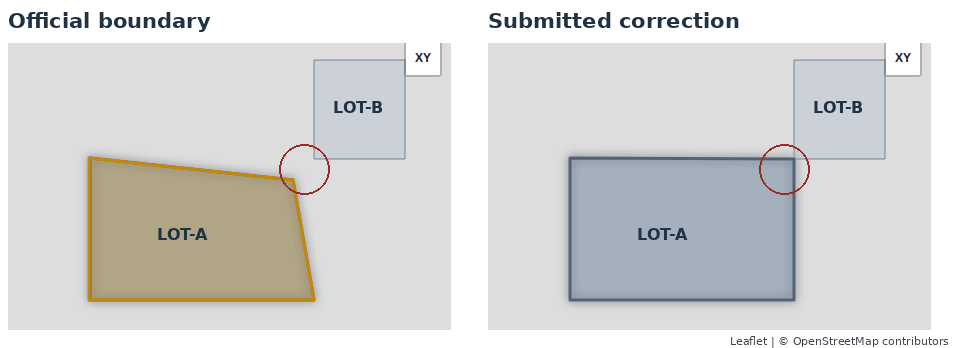
The maps below show the same two lots at the same scale. In the circle on the left, the official LOT-A stops short of LOT-B. On the right, the submitted corner meets LOT-B. Follow the other three corners of LOT-A across the two views to check that they stayed in place.
Follow the review and approval steps for the handoff.
Next exercise: Merge and split parcels.